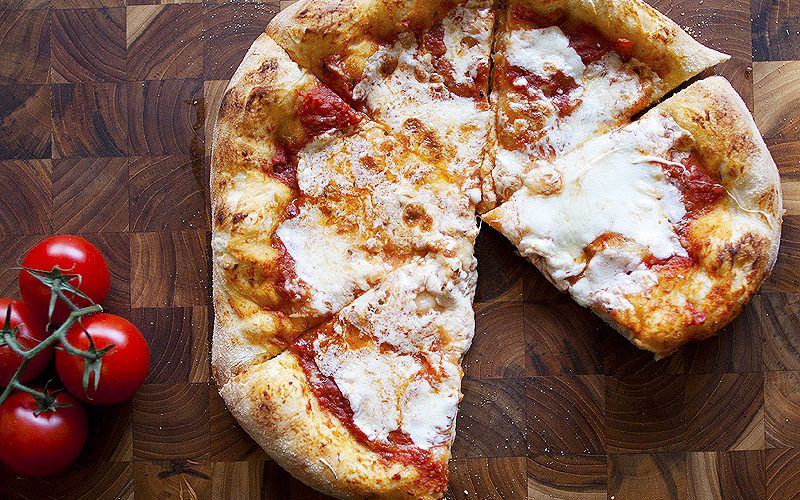
Sourdough pizza crust? Well, why not? For one thing, this crust can go from quite sour to “can’t even tell it’s sourdough,” depending on how recently you’ve fed your starter. Even the merest hint of tang comes across as rich flavour, which marries beautifully with the usual pizza toppings of tomato, cheese, veggies, and meat.

| Prep Time | 20 minutes |
| Cook Time | 18 minutes |
| Passive Time | 5 hours |
| Servings |
pizzas
|
Ingredients
- 241 gr Sourdough
- 113 gr Tepid water
- 298 gr Plain flour
- 1 tsp Salt
- 0.5 tsp Dried yeast
- 3 tsp Italian herbs mix
- 1 tsp Garlic powder
Ingredients
|
|
Instructions
- Add the hot water, flour, salt, yeast, and Pizza Dough Flavor. Mix to combine, then knead until smooth and slightly sticky, about 7 minutes at medium speed using a stand mixer with dough hook. Place the kneaded dough in a lightly greased container, and allow it to rise until it's just about doubled in bulk. This might take 2 to 4 hours; it might take more. A lot depends on how recently you'd fed your starter; a starter that's been fed rather recently will react to the addition of flour and water more quickly than one that's been neglected for awhile. For a faster rise, place the dough somewhere warm (or increase the yeast). To slow it down, put it somewhere cool.
- For two thinner-crust pizzas, divide the dough in half, shaping each half into a flattened disk. Drizzle two 12" round pizza pans with olive oil, tilting the pans to coat the bottom. Place half the dough in each pan. Cover, and let rest for 15 minutes. Gently press the dough towards the edges of the pans; when it starts to shrink back, cover it, and let it rest again, for about 15 minutes. Finish pressing the dough to the edges of the pans.
- For a thicker-crust pizza, drizzle olive oil into a jelly roll pan (10" x 15") or half-sheet pan (18" x 13"), or similar sized pan; or a 14" round pizza pan, tilting the pan to coat with the oil. Shape the dough into a flattened disk or oval. Place it in the pan, cover it, and let it rest for 15 minutes. Push the dough towards the edges of the pan; when it starts to fight back, cover it and let it rest for 15 minutes. Finish pushing it to the edges of the pan.
- Cover the pan, and let the dough rise until it's as thick as you like. For thin-crust pizza made from fairly fresh starter, this may only be an hour or so. For thick-crust, using an old, little-used starter, this may take most of the day. There are no hard-and-fast rules here; it all depends on the inherent vigor of your starter, and how you like your crust. Once you make it a couple of times, you'll figure out what time frame works for you.
- Towards the end of the rising time, preheat your oven to 190C.
- For a thicker crust, pre-bake the crust for about 8 minutes before topping. Top, then bake until toppings are hot and cheese is melted and bubbly about 10 minutes. For thin crusts, bake for 4 to 5 minutes, then top and bake for an additional 10 to 12 minutes, or until toppings are as done as you like.
- Remove from the oven, and loosen the edges of the pizza with a table knife or heatproof spatula. Carefully lift it onto a cooling rack; you can serve it right from the pan, if desired, but a cooling rack helps keep its bottom crisp. Serve hot.
Recipe Notes
Be aware of some sourdough dynamics here. The less-used your starter, the more liquid on top, the sourer it's likely to be; using a starter that hasn't been fed for weeks will yield a pizza crust that rises slowly, and tastes quite tangy. This type of crust is handy when you want to make the dough in the morning, and have pizza ready for dinner. On the other hand, a starter that's fed regularly will yield a less-sour crust, one that will rise more quickly. This is a great "weekend" crust, as you can shape it at 8 a.m., and have pizza for lunch.
Share this Recipe
Loved this pizza crust!!